Sugar waxing, an age-old hair removal technique, is gaining immense popularity due to its natural and eco-friendly approach. As the name implies, sugar waxing utilizes a mixture of sugar, lemon, and water, offering an effective alternative to traditional waxing and shaving. It is lauded for its gentler treatment of the skin, cost-effectiveness, and ease of use at home. This article will guide you through understanding sugar waxing, its benefits, tools, and ingredients needed, the process of making and applying sugar wax, aftercare, common mistakes to avoid, and much more.
Understanding Sugar Waxing

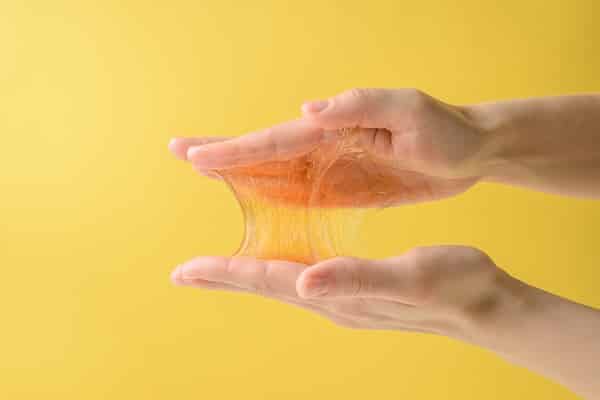
Sugar waxing, or sugaring, is a hair removal method from ancient Egypt. This natural, less abrasive form of hair removal involves a wax made primarily from sugar, water, and lemon juice. This mixture, when heated, forms a pliable wax that adheres to the hair, allowing for effective removal from the roots when pulled off.
Despite its historical roots, sugar waxing remains relevant due to its eco-friendliness and the simplicity of its ingredients. The application process, which involves removing hair in the direction of growth, is less harsh on the skin and follicles than other waxing methods. This minimizes the chances of breakage and irritation, making it suitable for sensitive skin.
Benefits Of Sugar Waxing

Sugar waxing is a hair removal process that offers numerous benefits over its counterparts. Since it’s less painful compared to traditional waxing, it’s a preferred choice for many. The wax only sticks to the hair and dead skin cells, leaving the live skin cells undamaged. This leads to less redness, irritation, and pain during and after the waxing procedure.
Notably, sugar waxing aligns with the eco-conscious consumer’s mindset. Unlike many chemical-laden hair removal products, its all-natural ingredients render it biodegradable and non-toxic. Furthermore, DIY sugar waxing is incredibly economical. The ingredients are inexpensive and readily available, which, combined with the reusability of the wax, saves money in the long run.
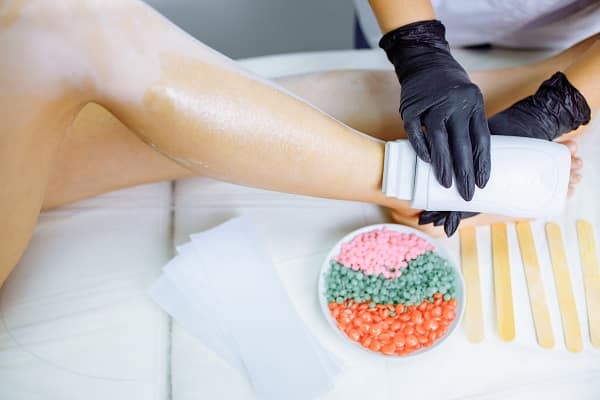
Necessary Tools And Ingredients

To create sugar wax at home, you will need a few basic ingredients: sugar, water, and lemon juice. Opt for organic, unprocessed sugar for the best results, and fresh lemon juice over the bottled variety due to its superior acidity. A candy thermometer will also help maintain the correct temperature for the perfect wax consistency.
Besides these ingredients, you’ll need some essential tools for application and removal. A spatula or butter knife will come in handy for spreading the wax, while a clean cotton cloth or strip can be used for the waxing. Ensuring these tools are clean and sterilized before use is crucial for avoiding potential skin infections or reactions.
Making Your Own Sugar Wax

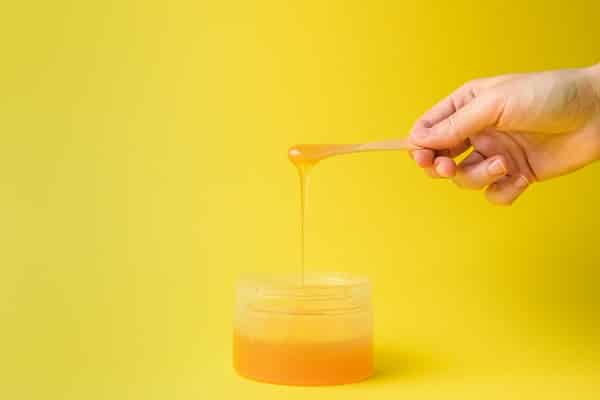
The process of making sugar wax at home is straightforward and involves cooking the ingredients until they reach an amber, honey-like consistency. Start by combining one cup of sugar, four tablespoons of lemon juice, and four tablespoons of water in a saucepan. Stir the mixture over medium heat until the sugar dissolves completely.
Safety should be paramount in this process. Be careful when handling the mixture, as it gets extremely hot. The ideal temperature for the mixture is around 240 to 250 degrees Fahrenheit. This can be monitored using a candy thermometer. If the mixture gets too hot, it could lead to burns, so careful monitoring is key. Let the mixture cool down slightly before using it to avoid potential skin burns.
Preparing Your Skin For Sugar Waxing
Skin preparation is a crucial part of the sugar waxing process. The area to be waxed should be clean and free from oils and moisturizers, as they can prevent the wax from adhering properly to the hair. Therefore, cleaning the area with mild soap and warm water is recommended, then drying thoroughly before waxing.
Exfoliation is another vital aspect of skin preparation. Exfoliating the skin removes the top layer of dead skin cells, allowing the wax to better grip the hair. However, avoid harsh exfoliation, which can lead to skin irritation. Finally, a patch test on a small area is always recommended to ensure no allergic reaction to the sugar wax.
The Sugar Waxing Process
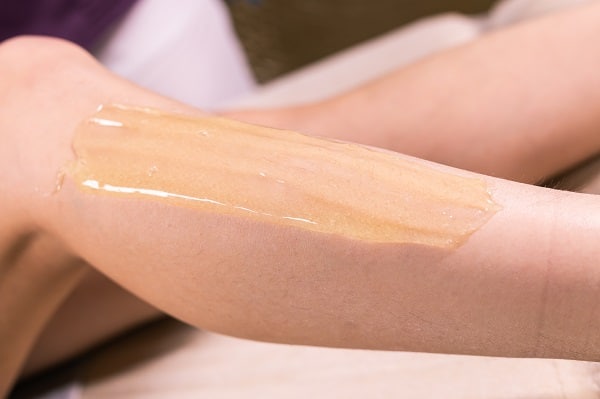
When it comes to the actual sugar waxing process, the application and removal technique is key for an effective and less painful experience. Using a spatula or butter knife, begin by applying a thin layer of sugar wax on the skin toward hair growth. Press a cotton strip onto the wax, smoothing it out in the same direction as the hair growth.
The next step, removal, is where sugar waxing stands out from traditional waxing. Unlike the latter, sugar wax is removed toward hair growth, which is more comfortable and minimizes the risk of hair breakage, ingrown hairs, and skin irritation. Hold the skin taut and quickly pull off the strip in the direction of the hair growth.
Aftercare And Skin Maintenance Post-Waxing
After the waxing session, proper aftercare is essential to soothe the skin and prevent irritation or ingrown hairs. Begin by washing the waxed area with warm water to remove residual wax. Applying a gentle, natural moisturizer or aloe vera gel can help soothe the skin and reduce redness and inflammation.
In the days following sugar waxing, it’s important to keep the skin clean and avoid excessive sweating or harsh skincare products, as these can irritate freshly waxed skin. Regular gentle exfoliation is recommended to prevent ingrown hairs. However, avoid exfoliation for at least 24 to 48 hours after waxing, as the skin would be too sensitive.
Common Mistakes To Avoid When Sugar Waxing
There are some common mistakes people make when sugar waxing at home. One such error is not heating the sugar wax to the correct temperature, which can lead to a wax that is too sticky or too hard to work with. It is important to ensure the sugar wax reaches the desired honey-like consistency and is then allowed to cool to a safe temperature for skin application.
Another common mistake is not properly preparing the skin before waxing or following correct aftercare. Both steps prevent skin irritation, redness, or ingrown hair. For the best results, ensure your skin is clean and exfoliated before waxing and follow up with a soothing moisturizer or aloe vera post-waxing.
The Bottom Line
Sugar waxing is an efficient, natural, cost-effective hair removal method with numerous advantages over traditional waxing and shaving. From understanding what sugar waxing is and its benefits to creating the wax at home, preparing your skin, and knowing the actual process, this guide has walked you through each step. Remember the importance of aftercare and avoiding common mistakes to ensure a smooth and successful waxing experience. Try it out, and enjoy the benefits of softer, smoother skin without unnecessary pain and harmful chemicals. As always, feel free to leave your comments and questions below.
Sources: